Tag: Write Back

  • Write Back Extensions – 3 in 1 Quickstart

    Write Back Extensions – 3 in 1 Quickstart

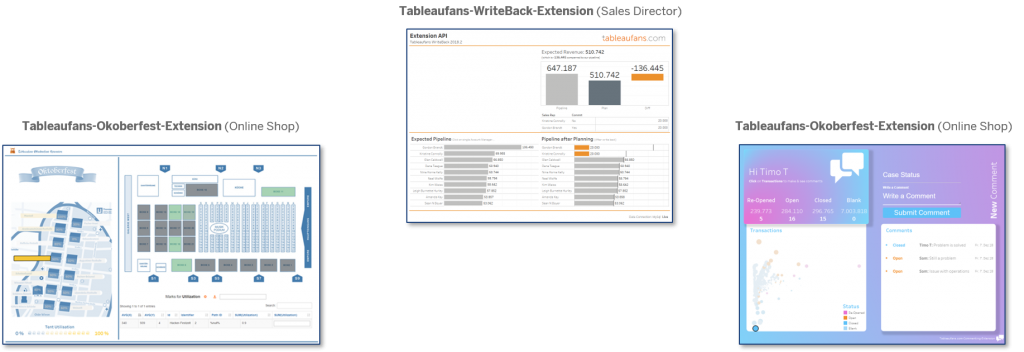
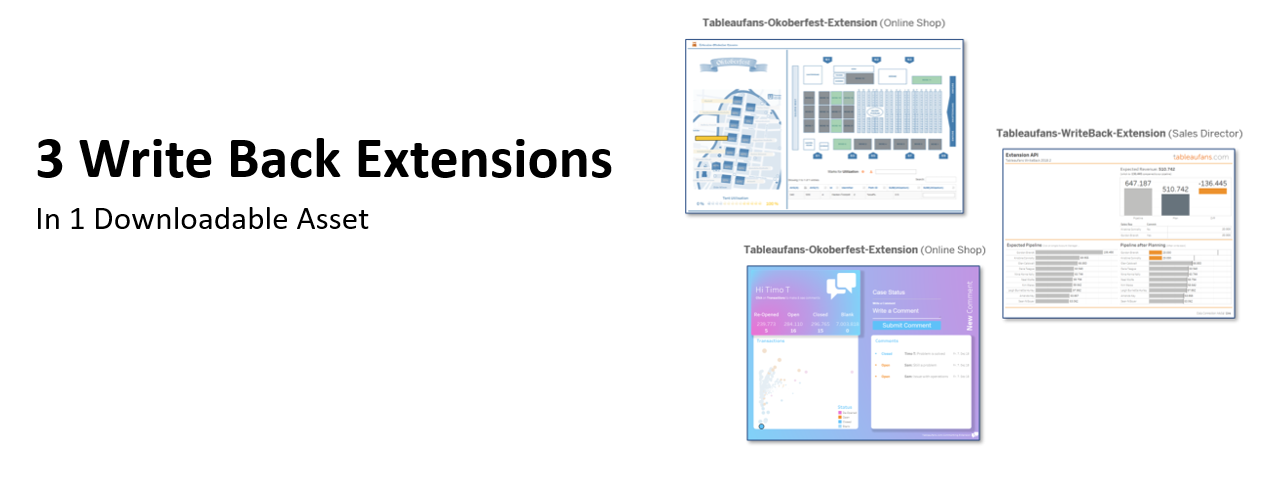
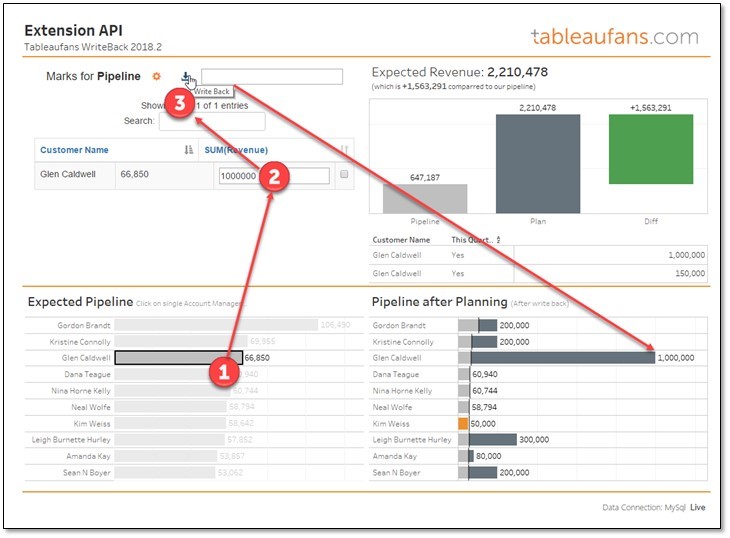
    In this blog post you can get all 3 Tableau Write Back Extensions as part of a larger demo asset – a Tableau Server Site which demonstrates all kinds of cool things on the Tableau Platform. Nevertheless people are regularly asking how to just quickly demonstrate how Tableau Write Back capabilities can look like. So this blog post is just about how to get the 3 Tableau Workbooks from above which include (Write Back Extensions) up and running as fast as possible?!

    How can I get it?

    Demo

    Demo

    System Requirements:

    • Windows operating system
    • Port 8888  needs to be open/free (Webserver)
    • Port 3306 needs to be open/free (MySQL)
    • Tableau Server 2018.3 or above


    Step-by-Step Installation

    Step-by-Step Installation

      1. Download this customized XAMPP 
        • Port 8888  needs to be open & free (Webserver)
        • Port 3306 needs to be open & free (MySQL)
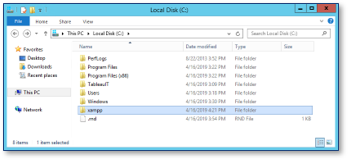
      2. Extract it into C:
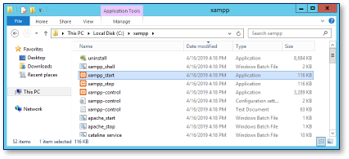
      3. Start the xampp_start.exe within C:\xampp-tableaufans
      4. Download and open the Tableau Workbooks
      5. Database password is “admin

    Troubleshooting

    • Troubleshooting

      • Port 8888  is already in use before starting Xampp
        (Change the port)
      • Port 3306 is already in use before starting Xampp
        (Change the port)
      • You’re using an older Tableau Version than 2018.3.x
        • Download and install Tableau Desktop 2018.3.x or above
        • Open up the workbooks from step 4
        • Go to File > Export As and select the version that you want to downgrade to  
        • Keep in mind that the version needs to support Tableau Extensions. Therefore 2018.2 or above is required


      • If it’s still not working see how you can debug Tableau Extensions generally

        Files from the Video:
        1. Download Chromium
        2. Start Tableau Desktop 2018.3 (with Extension in Debug Mode)

    FYI

    P.S. Database User/Password are both “admin/admin” for all examples where workbooks leverage the MySQL database on Xampp you’ve been downloading above. You can have a look at the tables being used via http://localhost:8888/phpmyadmin/db_structure.php?server=1&db=tableaufans


    Please let us know if this has been helpful and what kind of scenarios you’re looking forward to solve with it.

    TREX Files


  • Tableau Demo Site

    Tableau Demo Site

    Are you interested in setting up a Proof of Concept kind of environment where you can see embedded Tableau Dashboards in action?  If so, please follow the instructions below.

    The idea of this asset is to see how Tableau can look like in embedded scenarios, how you can extend Tableau’s capabilities with your own software and to test how Tableau Write Back Extensions can close the loop between analytics and transactional tasks. On top of that it contains a lot of great examples from Tableau Public. This helps you to spread the word around “what’s possible with Tableau” within your organization more easily or simply leverage it for yourself to get inspired! 😉


    How can I get it?

    Video Installation

    Video Installation

    System Requirements:

    • Windows operating system
    • Port 8888  needs to be open/free (Webserver)
    • Port 3306 needs to be open/free (MySQL)
    • Tableau Server 2018.3 or above


    Step-by-Step Installation

    Step-by-Step Installation

    1. Login to a Tableau Server test instance as Tableau Server Admin via your browser
      If it does not already on your Tableau Server, create a user “admin” with “Server Administrator” rights

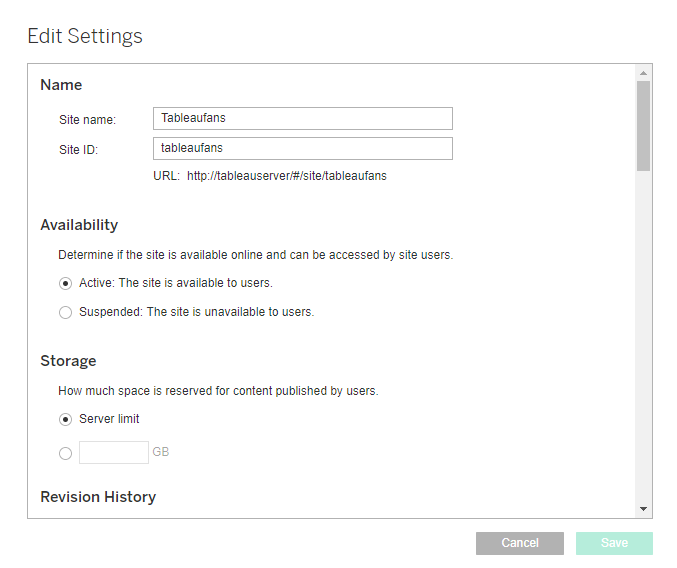
    2. Create a new Site which looks exactly like this!
      Site name: Tableaufans (upper case “T”)
      Site ID: 
      tableaufans (lower case “t”) 


    1. Download “Tableau Demo Asset” and UNZIP it’s content which contains:
      • mySqlDriver.zip (driver for mySql database)
      • tableaufans_public_demo_asset_site_v2019.4.zip (Tableau Server Site with great vizualizations)
      • tableaufans_public_demo_asset_thumbnails.zip (thumbnails for Tableau Server projects)
      • xampp-tableaufans.zip  (Webserver + MySQL DB in a single application)
    2. Copy the zip file called “tableaufans_public_demo_asset_site_v2019.4.zip” into “C:\ProgramData\Tableau\Tableau Server\data\tabsvc\files\siteimports“
    3. Run the following commands via command line (Tableau Server must be running; official documentation):
      tsm login --username YOUR-USERNAME --password YOUR-PASSWORD
      tsm sites import --site-id tableaufans --file tableaufans_public_demo_asset_site_v2019.4.zip
    1. Follow the instructions in the command line window
      tsm sites import-verified --id tableaufans --import-job-dir import_XXXXXXXXXXXXXXX
      If this succeeded simply open Tableau Server to already see some awesome dashboards of the Tableau community!!! 


    In order to leverage the full demo asset including embedded Tableau Dashboard examples + Write-Back-Extensions follow the last 2 steps

    1. Go back to the downloaded ZIP file and extract the content of “xampp-tableaufans_v2019.1.3.zip” directly into your C: drive​
      (Hint: You should then see “C:\xampp” folder or “C:\xampp-tableaufans”)

      • It contains an Apache web server (needs port 8888)
      • It contains MySQL (needs port 3306 – username/pw = admin/admin)
      • Tableau’s GitHub ​Extensions Folder + 3 Tableaufans Extensions 

    • Start C:\xampp-tablfeaufans\xampp_start.exe as administrator

    1. Go back to the downloaded ZIP file –> extract the MySQL drivers and install them
    2. DONE!


    P.S. If you’d like to have the same nice little thumbnails per project as you can see within the installation video or the blog post image just go back to the downloaded ZIP file and extract + copy the content of “tableaufans_public_demo_asset_thumbnails.zip” into “<YOUR-PATH>Tableau Server\data\tabsvc\httpd\htdocs”.


    Troubleshooting

    Troubleshooting

    Before you’re looking into this section I encourage you to watch the installation video (if you’ve been following the step-by-step guide) as this demonstrates each and every installation step and how it worked on a blank AWS VM.

    Troubleshooting – Importing Site:

    1. Make sure you run the “tsm sites import-verified –id tableaufans –import-job-dir import_26124ec_2019XXXXXXX” command!
    2. If you’ve done this and it didn’t work:
      1. Delete the “tableaufans” site
      2. Restart your computer repeat to follow the instructions from top (it makes sure that noting interferes Tableau Server and your import process) 
      3. Make sure you’ve logged out all active users from Tableau Server and closed all browser windows prior to importing the site
      4. Make sure you’ve closed all Windows windows + all CSV files prior to the “tsm sites import-verified” command
    3. If this didn’t help you to import please check the latest import/export site documentation
    4. If nothing helps please post a comment below so that the community can help you out


    Troubleshooting – Starting Xampp:

    FYI

    P.S. Database User/Password are both “admin/admin” for all examples where workbooks leverage the MySQL database on Xampp you’ve been downloading above. You can have a look at the tables being used via http://localhost:8888/phpmyadmin/db_structure.php?server=1&db=tableaufans


  • Tableau Write Back Extensions

    Tableau Write Back Extensions

    Are you interested in trying the following 3 Tableau Extensions in your own environment?

    • If so, please follow the instructions from this blog post as it contains all 3 of them + much more as a Tableau Server Site which your can import 
    • Or this blog post if you want to get them up and running in just a few minutes 😉


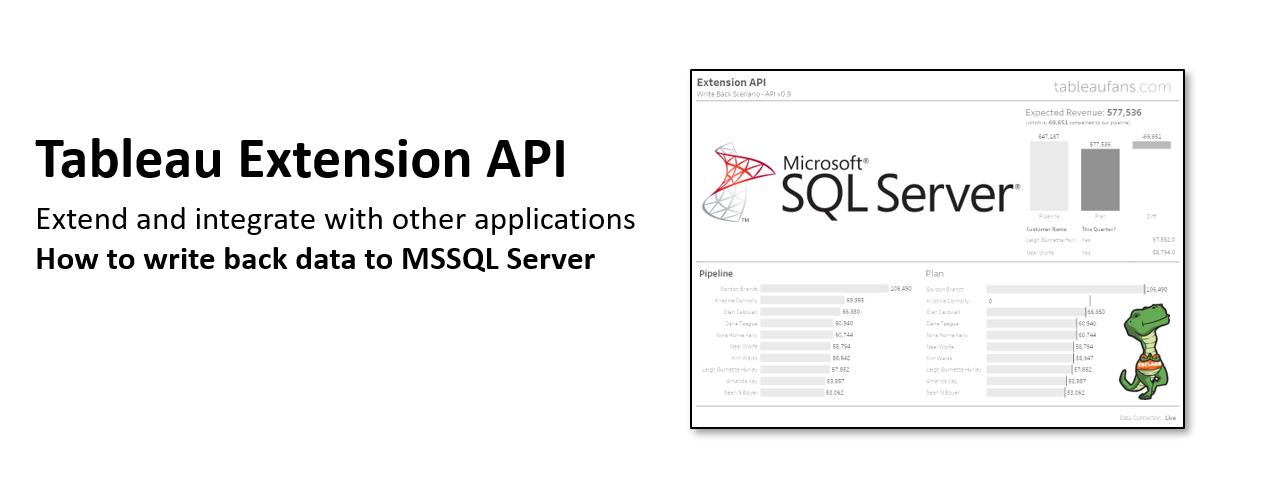
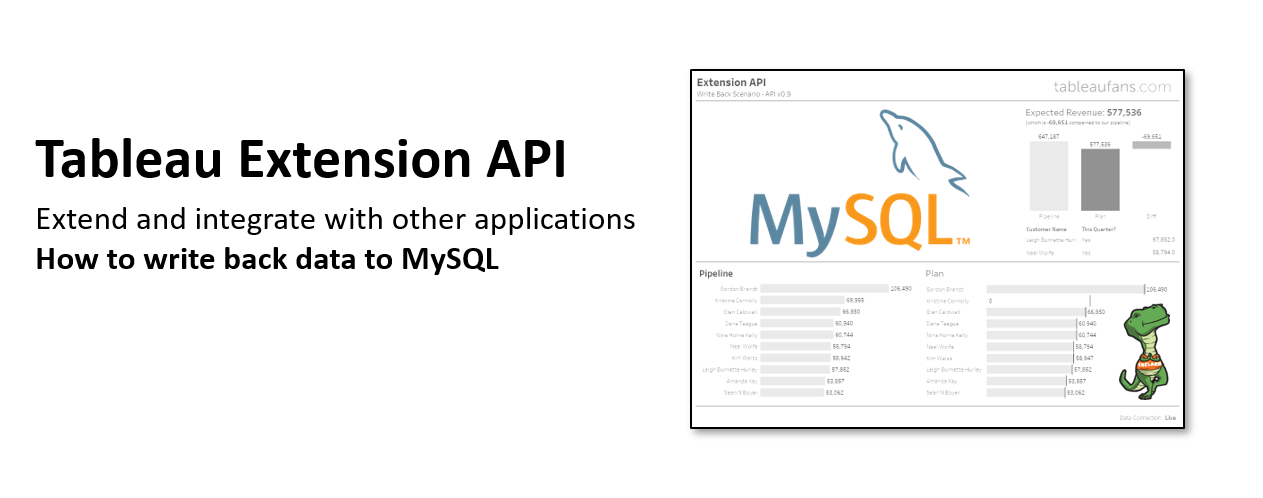
  • How to write back data to Microsoft SQL Server, MySQL or SAP HANA?

    How to write back data to Microsoft SQL Server, MySQL or SAP HANA?

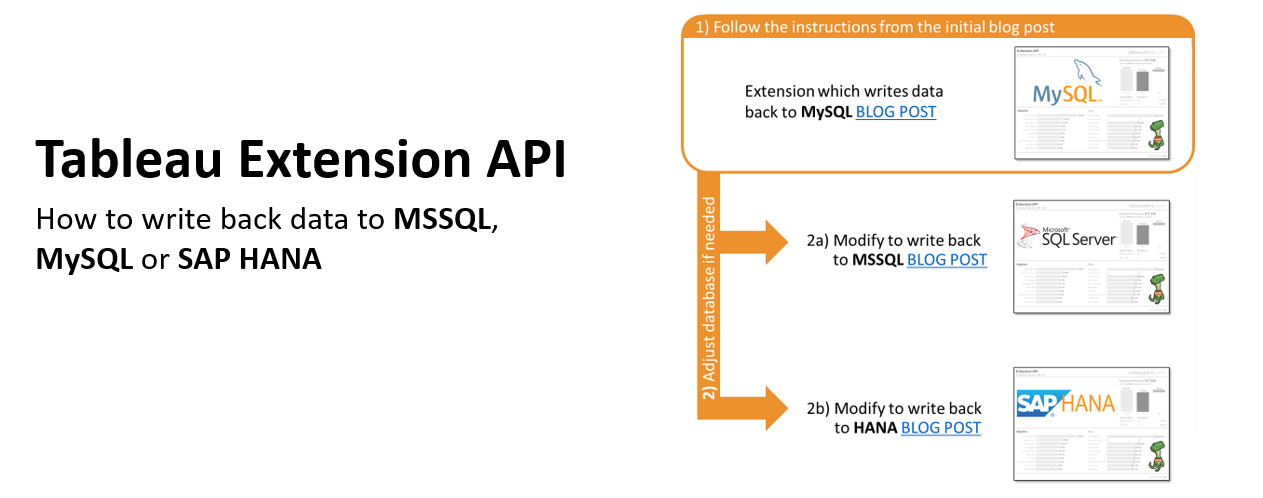
    Last year in March I’ve been posting an extension which allowed Tableau end users to write back data directly from within a dashboard. Back in the days Tableau Extensions have been available in BETA only. Today – roughly 12 month later – 2 Tableau ROCKSTARS joined me on Tableaufans.com and shared their modified versions of the original extension. Therefore I’m happy to announce that you can now simply start to setup the extension you can see in the video below by:


    1. Must: Follow the instructions from the initial blog post
    2. Optional:Modify the Extension files from above to either

      a) Adjust files to write data back to Microsoft SQL Server

      b) Adjust files to write data back to SAP HANA

    You’re good to go. If you are interested in commenting single data points like outliers and having a conversation around them rather than commenting a whole dashboard find this Tableaufans Commenting Extension

    Other than that we’re always looking for feedback. So please give us an idea how helpful this blog post has been by leaving us a short comment below. Thanks a lot, Timo.


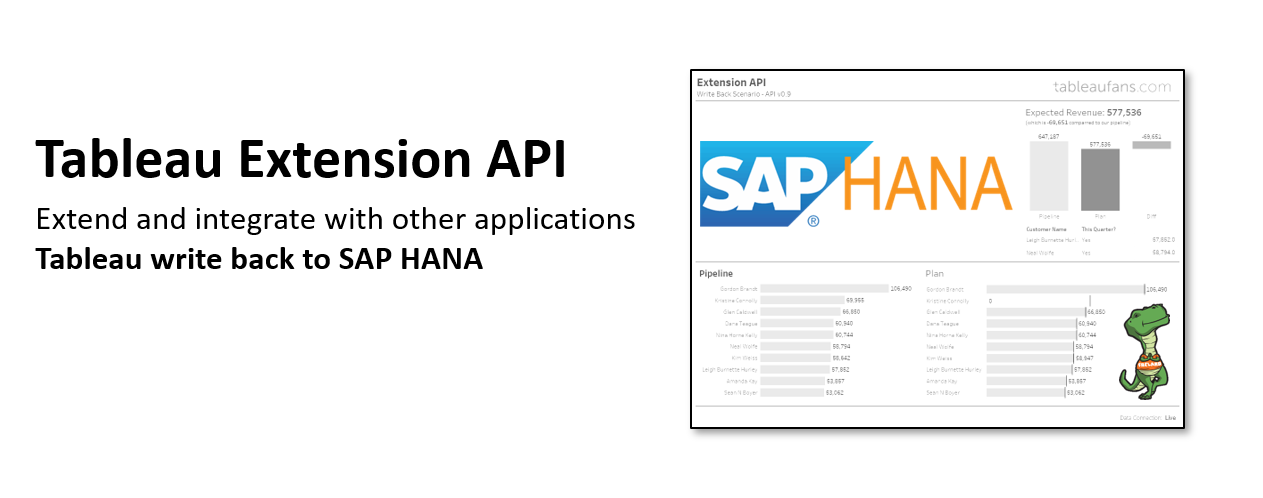
  • How to write back data to SAP HANA?

    How to write back data to SAP HANA?

    Preface

    This document assumes you are already using or used Timo’s  Extension write back to MYSQL. You can use same XAMPP, however since I already have npm on my machine I was using that as a webserver to host the PHP file which finally writes back the data to SAP HANA.

    Extensions work for both HANA 1.0 and also 2.0(XSA-HDI)

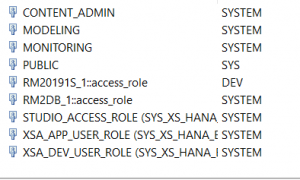
    Step 1: Create a New User on HANA if you don’t already have one

    Make sure the user has a content admin role over the required schema (synonyms/CDS objects if using 2.0).

    Step 2:  As mentioned in MYSQL blog post create similar tables in HANA. You can create a columnar or a row table in HANA according to your needs. Both will work for this solution.

    Note :For autoincrement in HANA for any column you would need to define the column as primary key and make it as IDENTITY 


    Step 3: Download and Install required Drivers

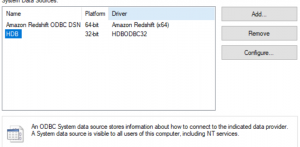
    • The code used the 32 bit HDB HANA driver. Execute c:\Windows\SysWOW64\odbcad32.exe in run
    • Download the HDB 32 bit HANA driver from SAP market place(SAP made it far more easier now to download the drivers)
    •  install the drivers 


    Step 4: Follow the same instructions from Timo blog post over copying all the required files of the extensions.

    Before testing the HANA insert records PHP file, make sure to modify the ini file under location xampp\php in my case it is under npm. Modifaction requires you to just uncomment below two dll libraries which are already in the INI file.

    extension=php_pdo_odbc.dll
    extension=php_odbc.dll


    Step 5: Inserting records into HANA PHP file

    Below is the code : You can run this PHP from your browser to test if statements are working. Easiest way is use Select ‘A’ from dummy staement or even simple INSERT statment with dummy values into the table you created.

    <?php
    $customerName = $_POST['name'];
    $clusterName = $_POST['cluster'];
    $checkBox = $_POST['checkbox'];
    $userInput = $_POST['userinput'];
    $selectedMeasure = $_POST['measure'];
    
    if (! extension_loaded('odbc'))
    {
    die('ODBC extension not enabled / loaded');
    }
    
    
    $driver = 'HDBODBC32';
    
    $host = "HANA:30015";
    
    // Default name of your hana instance
    $db_name = "HDB";
    
    // Username
    $username = 'makkena';
    
    // Password
    $password = "HANA";
    
    // Try to connect
    $conn = odbc_connect("Driver=$driver;ServerNode=$host;Database=$db_name;", $username, $password, SQL_CUR_USE_ODBC);
    
    if (!$conn)
    {
    // Try to get a meaningful error if the connection fails
    echo "Connection failed.\n";
    echo "ODBC error code: " . odbc_error() . ". Message: " . odbc_errormsg();
    }
    else
    {
    // Do a basic select from DUMMY with is basically a synonym for SYS.DUMMY if you need to test in HANA
    $sql = "INSERT INTO CPG.getdataandwriteback (ClusterName,CustomerName,CheckBox,UserInput,SelectedMeasure) VALUES ('".$clusterName."','".$customerName."','".$checkBox."','".$userInput."','".$selectedMeasure."')";
    $result = odbc_exec($conn, $sql);
    if (!$result)
    {
    echo "Error while sending SQL statement to the database server.\n";
    echo "ODBC error code: " . odbc_error() . ". Message: " . odbc_errormsg();
    }
    else
    {
    while ($row = odbc_fetch_object($result))
    {
    var_dump($row);
    }
    }
    odbc_close($conn);
    }


    Step 6: Update your MarkSelection JS file to refer to this PHP file created above.

    • Assume you are using Timo JS code, just rename the reference of  Timo’s INSERT PHP file to HANA one that you created in Step 5.
    • Also since Timo’s dashboard is using the data source name as MYSQL you might have to change that in case you decide to change the data source name in your dashboard. For example, if I created the Data Source named HANA on these Tables create in the above steps I will have to change the JS script code referencing the data source name.


    Step 7: Follow the same steps from Timo’s original blog to test the insert records update from Tableau Dashboard and your done! 😉

  • How to write back data to Microsoft SQL Server?

    How to write back data to Microsoft SQL Server?

    Preface

    This document assumes you have fully installed XAMPP, MySQL and Tableau Extensions per this blog: https://tableaufans.com/extension-api/tableau-extension-api-write-back-updated-source-code-for-tableau-2018-2/


    Step 1: Create a New SQL Server User

    Log in to the SQL Server you want to setup for write back with SSMS.  Create a new User called ‘Tableau’ with the Password ‘Tableau’.
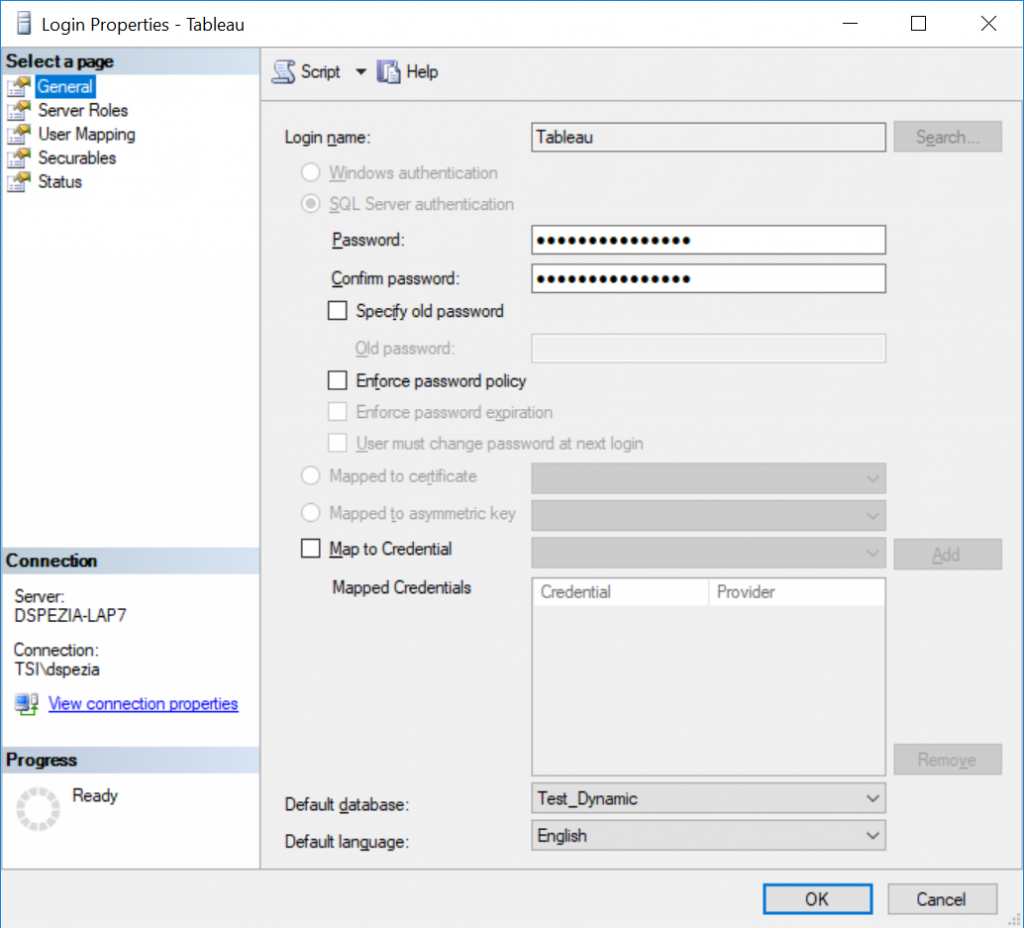
    Step 2:  Add Write Back Table to SQL Server

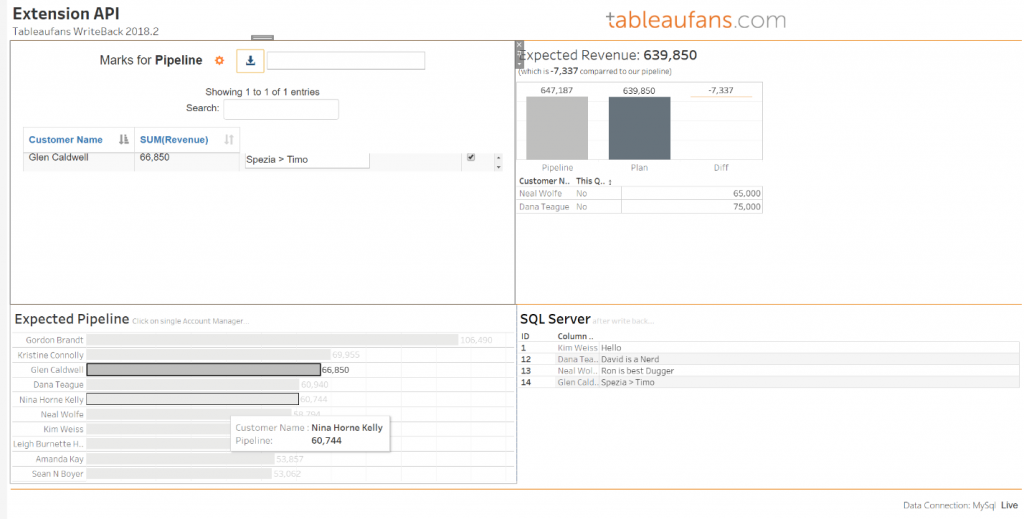
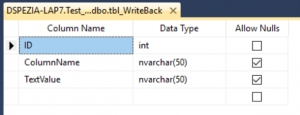
    While still in SSMS, add a Table for writing back to called ‘tbl_WriteBack’ to a database of your choice.  I used a database named ‘Test_Dynamic’ for my purposes.  The table as am [ID] integer with an identity and serial increase and 2 nvarchar(50) for [ColumnName] and [TextValue].
    Step 3:  Give the Tableau User CRUD Permissions to the tbl_WriteBack

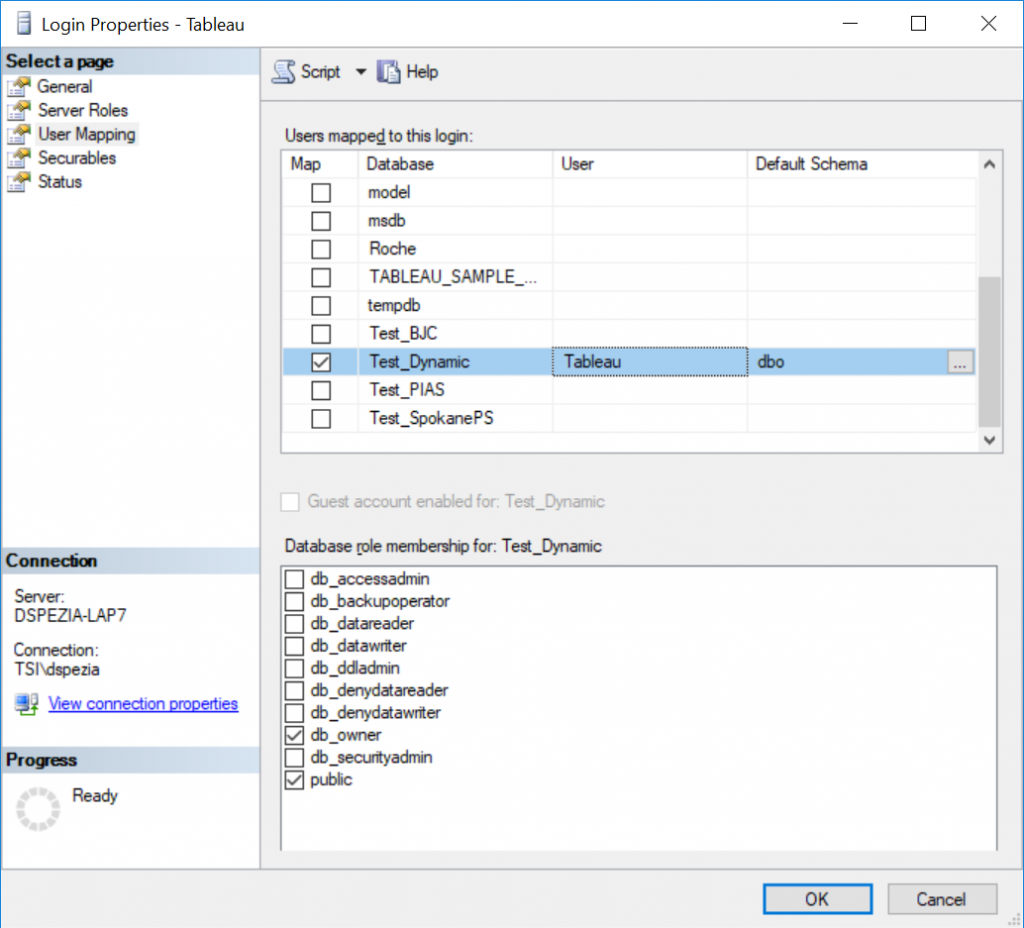
    Use SSMS to update the permissions for the ‘Tableau’ user to be able to CRUD the new table created in Step 4.
    Step 4: Duplicate the MySQL Writeback Code

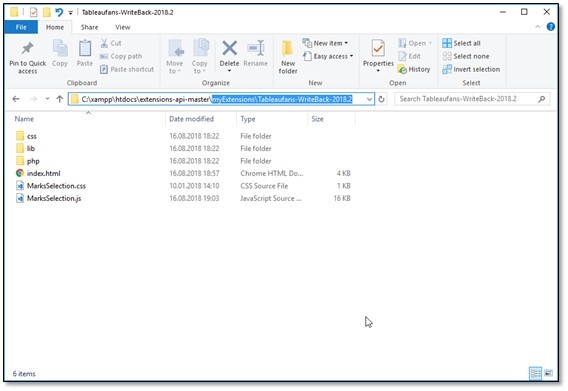
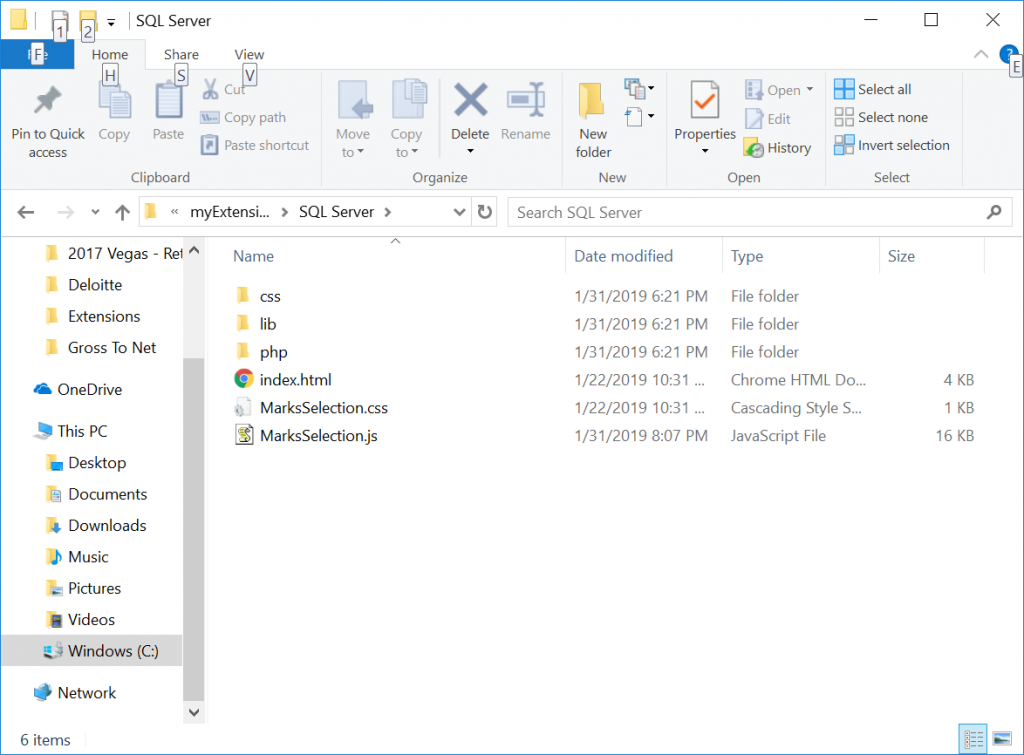
    Copy the Entire Directory C:\xampp\htdocs\extensions-api-master\myExtensions\Tableaufans-WriteBack-2018.2 to C:\xampp\htdocs\extensions-api-master\myExtensions\SQL Server
    Step 5: Create new TREX file

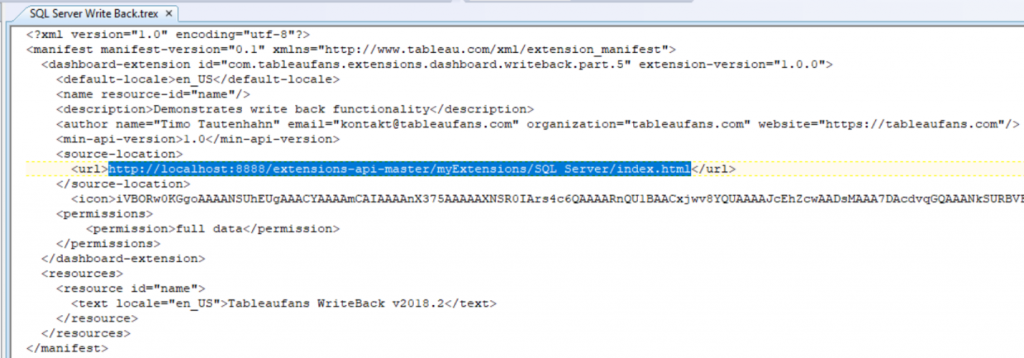
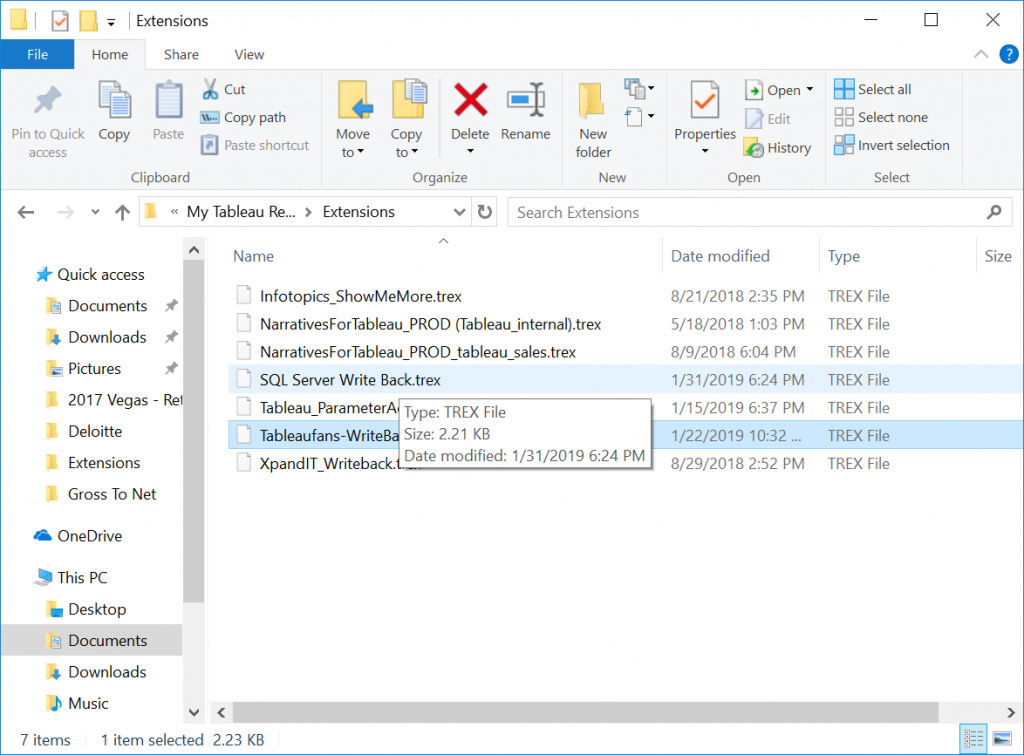
    Copy the Tableaufans-WriteBack-2018.2.trex file in C:\Users\dspezia\Documents\My Tableau Repository\Extensions to the same directory and rename it SQL Server Write Back.  Edit the TREX file to path to the correct write back JS and HTML.  Edit the <URL> Element to:

    <url>http://localhost:8888/extensions-api-master/myExtensions/SQL Server/index.html</url>
     

    Step 6: Install SQL SVR for PHP

    Get the latest SQL Server for PHP 7 drivers from https://docs.microsoft.com/en-us/sql/connect/php/step-1-configure-development-environment-for-php-development?view=sql-server-2017.  Unpack the SQL Server drivers to C:\xampp\php\ext by running the SQLSRV53.EXE.  You only need the php_pdo_sqlsrv_7_ts_x86.dll and php_sqlsrv_7_ts_x86.dll so you can delete the other sqlsrv dlls that were installed.
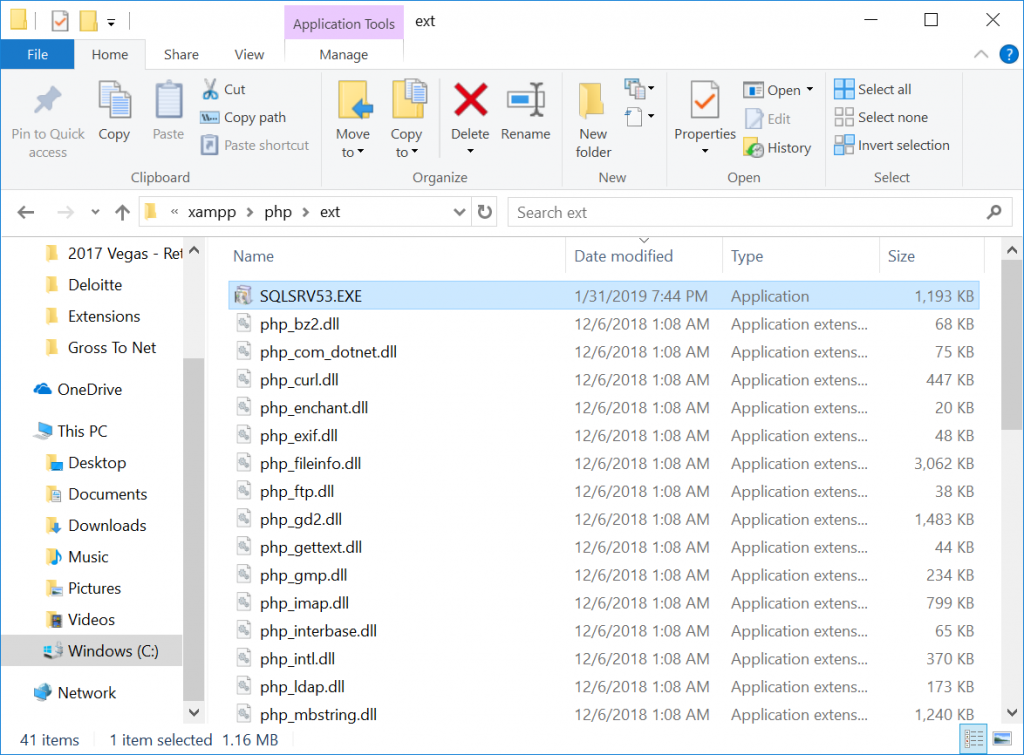
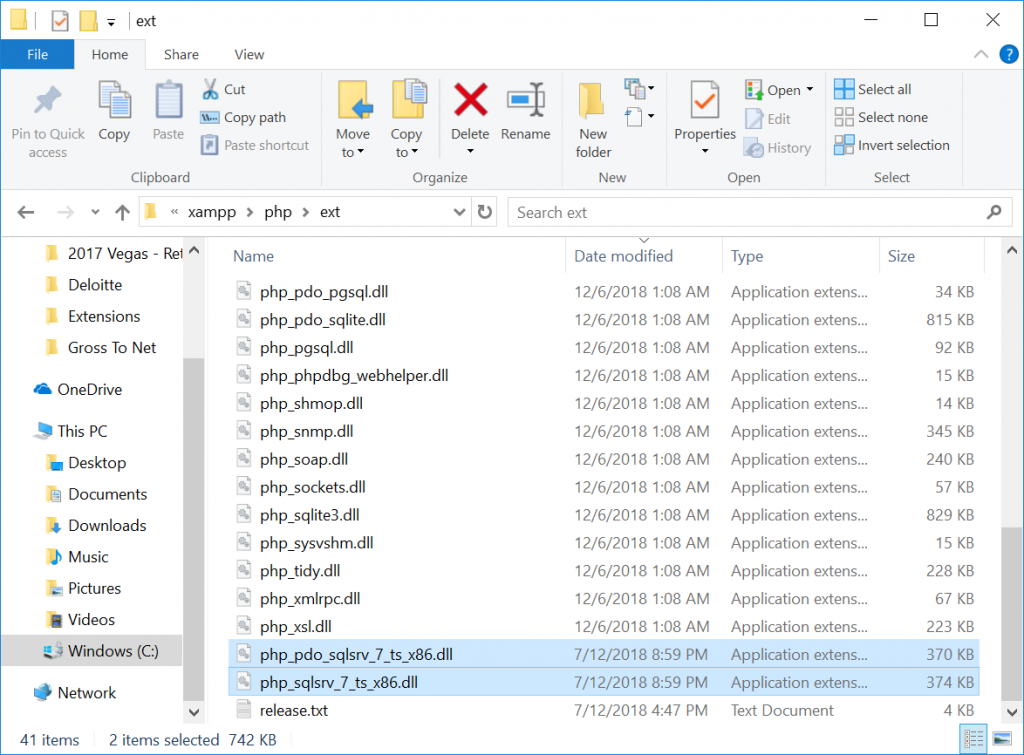
    Step 7: Update the PHP Settings

    Update php.ini to point to the new DLLS for SQL Server.  Update php.ini in C:\xampp\php to include the 2 new extensions.  I added them at lines 877 and 878.

    extension=php_pdo_sqlsrv_7_ts_x86.dll
    extension=php_sqlsrv_7_ts_x86.dll.

    If you don’t do it write you will see “PHP Fatal error:  Uncaught Error: Call to undefined function sqlsrv_connect() in C:\\xampp…” in the apache error log in xampp C:\xampp\apache\logs\error.log
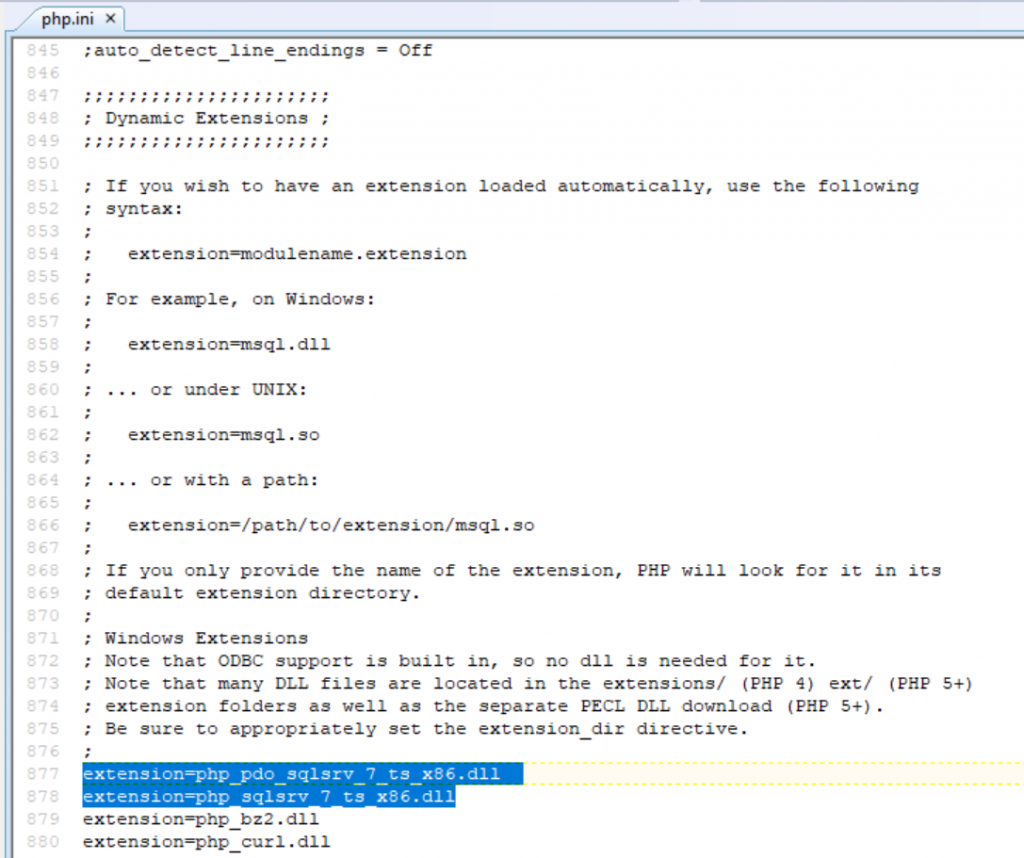
    Step 8: Update the PHP Code

    Update the writeToDb.php code found in C:\xampp\htdocs\extensions-api-master\myExtensions\SQL Server\php.  I set mine up like this:

    <?php
    
    $customerName = $_POST['name'];
    $clusterName = $_POST['cluster'];
    $userInput = $_POST['userinput'];
    $checkBox = $_POST['checkbox'];
    $selectedMeasure = $_POST['measure'];
    
    $serverName = "localhost";
    $options = array( "UID"=>"Tableau", "PWD"=>"Tableau", "Database"=>"Test_Dynamic");
    $conn = sqlsrv_connect($serverName, $options);
    
    if( $conn === false )
         {
         echo "Could not connect.\n";
         die( print_r( sqlsrv_errors(), true));
         }
    
    $query = "INSERT INTO [dbo].[tbl_WriteBack] (ColumnName,TextValue) VALUES(?, ?)";
    $params1 = array($customerName,$userInput);
    $result = sqlsrv_query($conn,$query,$params1);
    
    sqlsrv_close($conn);
    
    ?>


    Step 9: Update the JS Code

    You need to update the refresh code to update the new SQL Server Data Source.  Open the JS file MarksSelection.js in C:\xampp\htdocs\extensions-api-master\myExtensions\SQL Server.  And change the Refresh Section line 467 to 476 to this:

    var datasourceName = dashboardDataSources[dataSource.id].name;
    
                          if (dashboardDataSources[dataSource.id].name == "DatasourceSQL")  {
    
                                 //refreshDataSource(dashboardDataSources[dataSource.id]);
    
                                 //alert("id: " + dashboardDataSources[dataSource.id]);
    
                                 //alert("dataSource.id: " + dataSource.id);
    
                                 refreshDataSource(dashboardDataSources[dataSource.id]);
    
                                 console.log("refreshSQL() was called for Datasource Name: 'DatasourceSQL'");
    
                          }


                         //refreshDataSource(dashboardDataSources["DatasourceSQL"]);

    Step 10: Update the TWB

    Duplicate the TWB for MySQL Write Back.

    Add a Data Source to the tbl_WriteBack named “DatasourceSQL”
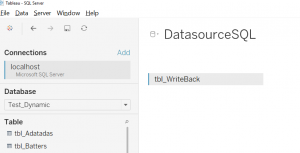
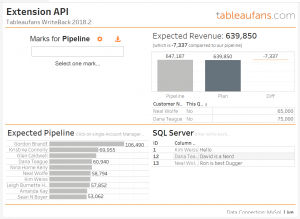
    Add a Viz to Display Data from the new WriteBack Table.  Replace the Pipeline after Planning Chart with the new Viz and replace the Old Ext with your new Ext.
    Step 11: Have Fun!

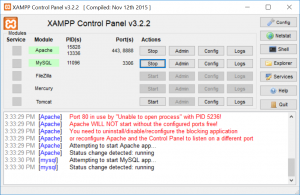
    Start your MySQL and Apache Server in XAMPP and have fun!
  • Tableau Extension API – Write Back – Updated Source Code for Tableau 2018.2

    Tableau Extension API – Write Back – Updated Source Code for Tableau 2018.2


    LATEST VERSION OF THIS WRITE BACK EXTENSION => CLICK HERE


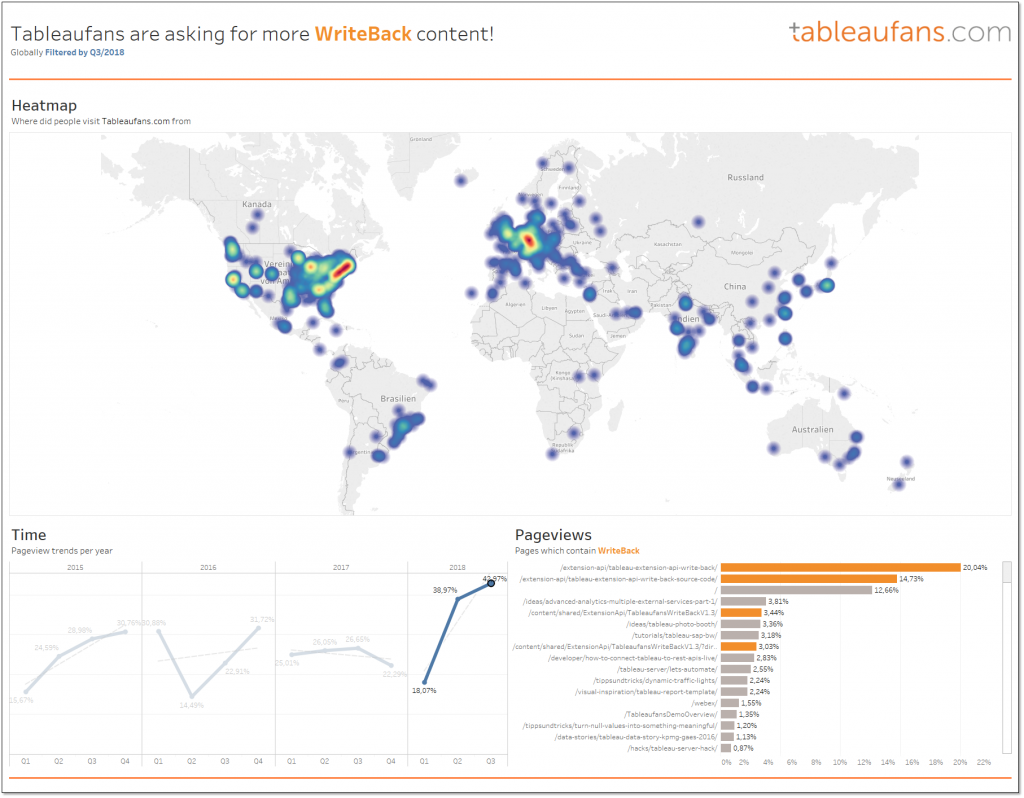
    Due to the Google Analytics analysis I’ve done for the current quarter one can easily see that you – the Tableau community which we call “Tableaufans” – have been asking for more write back content. Would you agree?

    So as a very first step I’m going to attach a quick tutorial around how to get “Tableaufans-WriteBack-2018.2” up and running for Tableau’s latest release (2018.2) and above. If you haven’t heard about “Tableaufans.com’s Write Back Extension” yet, you might want to watch the ~4min video from one of the previous posts to understand what you could get by following these steps.

    1. In order to be able to leverage the write back extension you need to have a webserver and a MySQL database
      1. I’m using XAMPP version 7.0.23 which contains both. You can download it here.
      2. Once you’re done downloading it you can extract the folder directly into C:
        (By copying it directly into C: it would simply allow you to follow all of my tutorials around extensions and JS API just a little bit easier in the future.)
      3. Start “C:\xampp\xampp_start.exe” as administrator
    2. Download the latest extension-api-master here: https://github.com/tableau/extensions-api
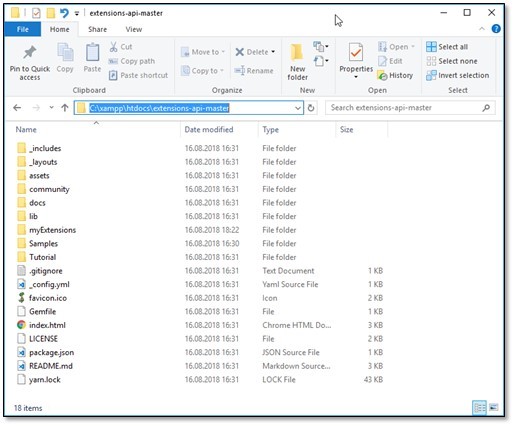
    3. Extract the content and paste it into your webserver (C:\xampp\htdocs)
    4. Extract the zip below and create a new file path where you extract it’s content into:
      Tableaufans-WriteBack-2018.2.ServerLogic(HTML,PHP,JS,CSS,)
    5. Extract the *.trex file and copy it into C:\Users\<USERNAME>\Documents\My Tableau Repository\Extensions
      Tableaufans-WriteBack-2018.2
    6. Make sure your XAMPP (Webserver+MySQL database) is up and running
      1. Apache should use port 8888
      2. Mysql 3306
        -> (If this is not the case, please change your ports accordingly as it will help you to use more assets from Tableaufans.com in the near future)
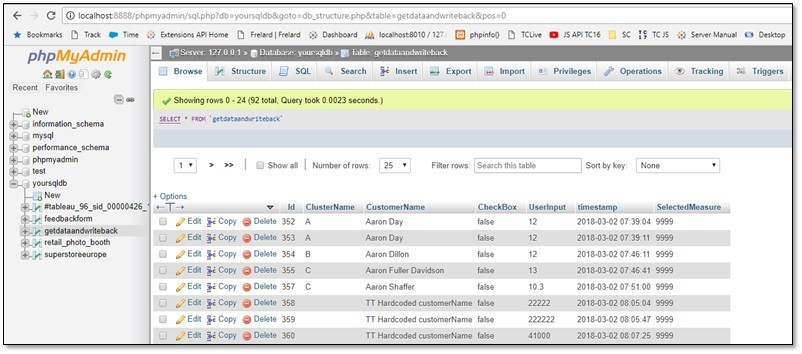
    1. MySQL should have a database called ‘yoursqldb’ with a table ‘getdataandwriteback’:
      (if not, please use ‘yoursqldb.sql’ attached to create the table within a database called ‘yoursqldb’)
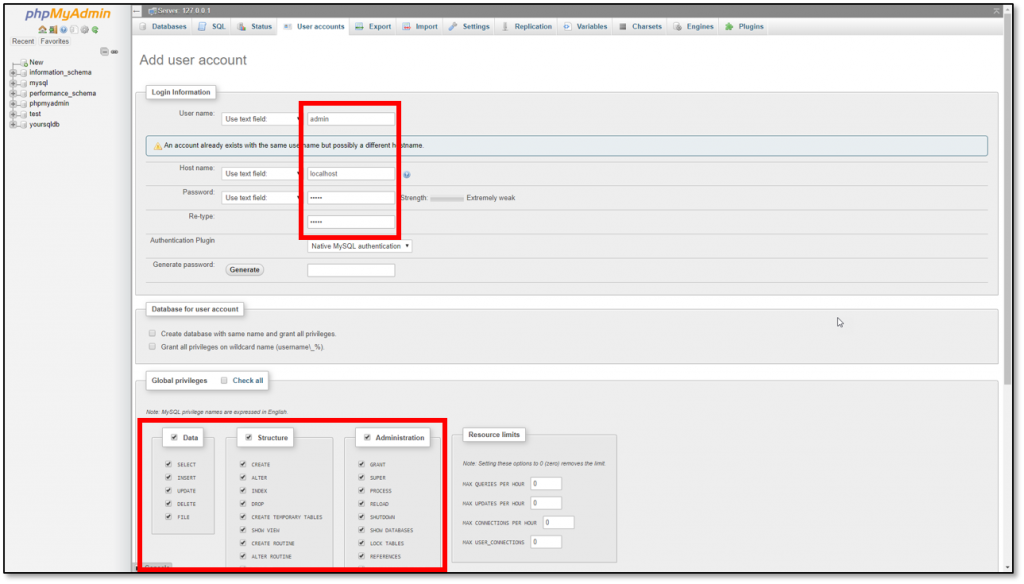
    2. Add a new user to MySql (direct link to the right user interface on MySql)
      1. User name: admin
      2. Host name: localhost
      3. Password: admin
      4. Re-type: admin
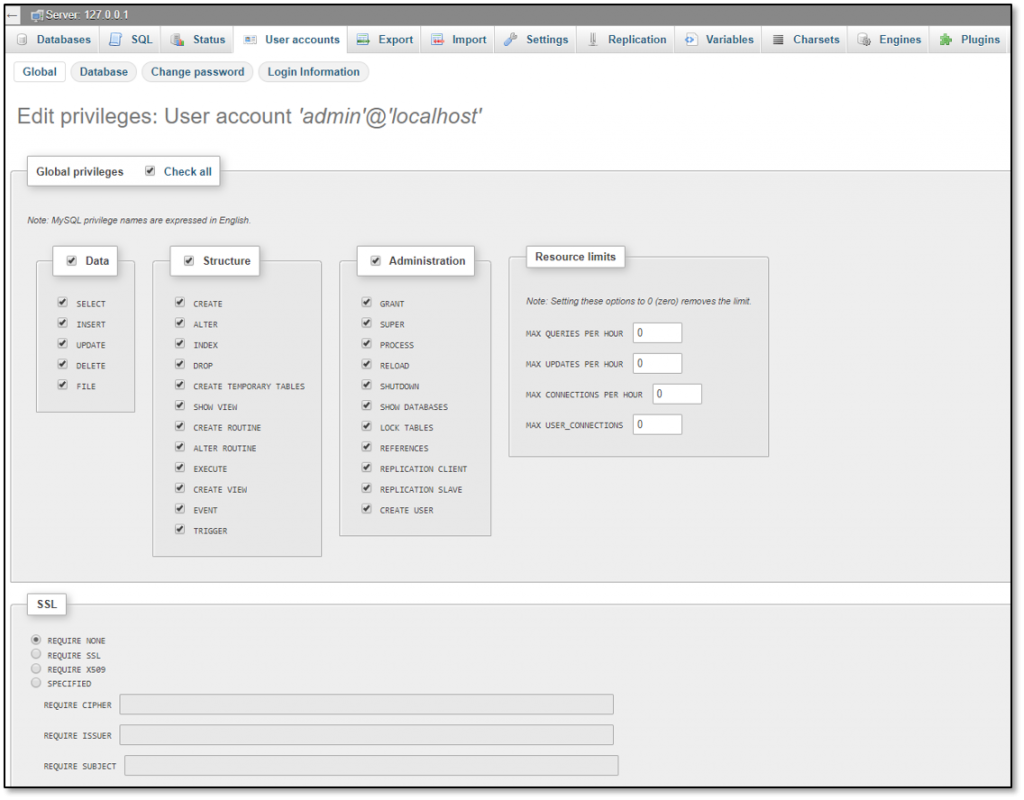
      5. Privileges: Data, Structure & Administration
    3. Extract and Open “Tableaufans-WriteBack-2018.2.twbx.zip” with Tableau Desktop
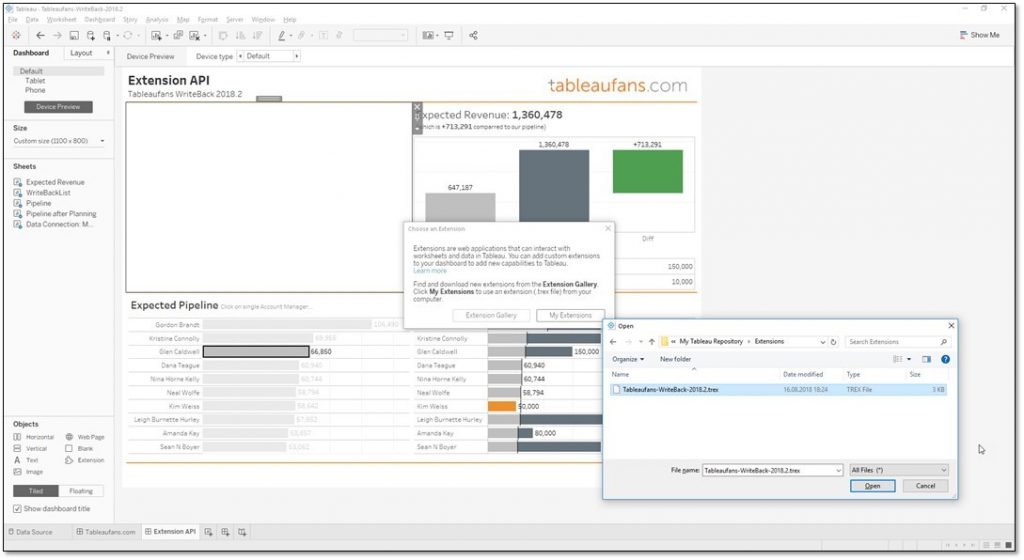
    4. Drag and drop extension into the canvas and choose the one you copied into C:\Users\<USERNAME>\Documents\My Tableau Repository\Extensions
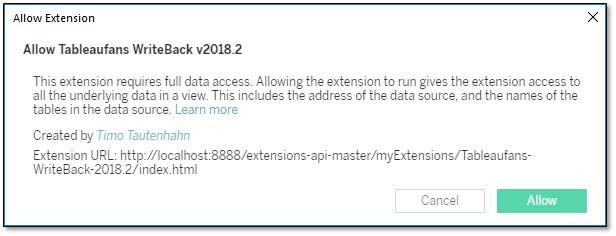
    5. Allow data access to the extension:
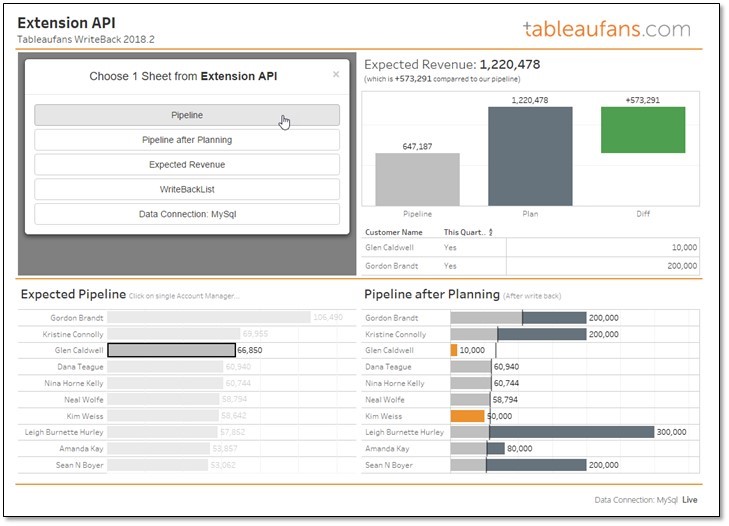
    6. Choose “Pipeline” as sheet to choose data selections from:
    7. Happy write back your data 😉


    Troubleshooting:

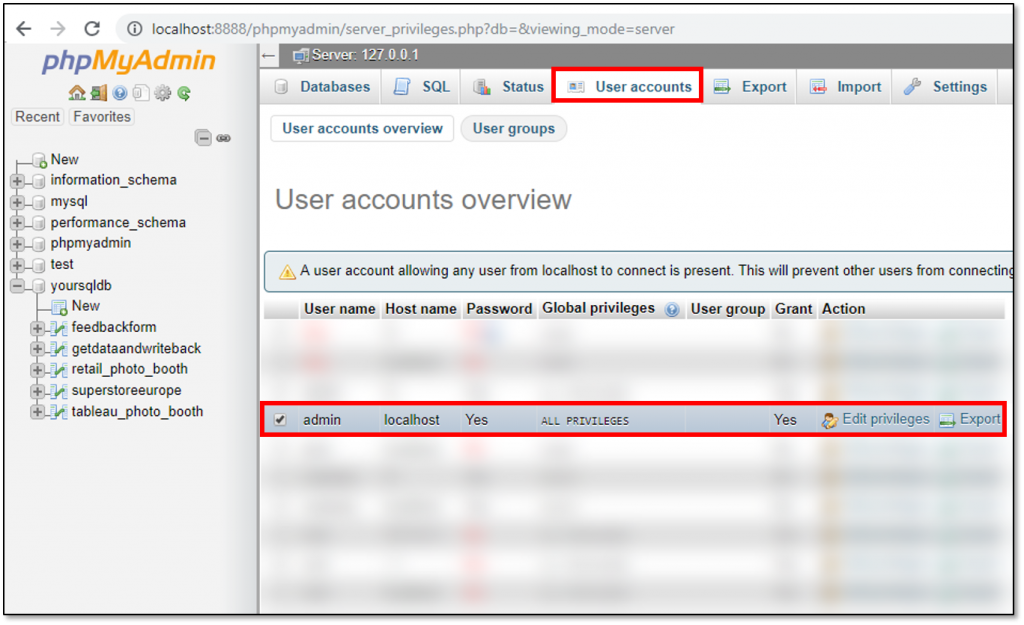
    • If the data doesn’t get written into the database make sure that you’ve got a user called “admin” in MySQL with password “admin” with the following permissions:
      • http://localhost:8888/phpmyadmin/server_privileges.php?db=&viewing_mode=server
      • http://localhost:8888/phpmyadmin/server_privileges.php?username=admin&hostname=localhost&dbname=&tablename=&routinename=
    • If you want to debug Tableau Extensions generally you might want to have a look the following 2:21 min tutorial

      Start Tableau Desktop (with Extension in Debug Mode).bat
    • If you’re having any troubles in getting the extension up and running please leave us a comment below.